I'm a big fan of Hammer Films and the old Universal Horrors. It was only natural that I would, at some point, pay homage to these two huge influences on me.
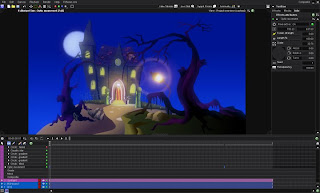
This shot features a track towards a Haunted House. A few years ago I created a Haunted House in 3D so I used this as my starting point and traced it in Anime Studio.
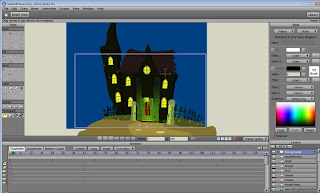
I still have the door and door archway to trace in the above image. As I wanted to track towards the house I needed the various parts of the scene on separate layers so I could move them independently. I ended up with this.
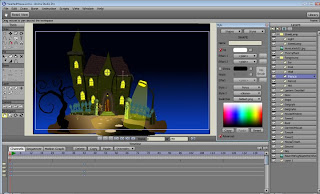
It wasn't really satisfactory. It looked okay in my original storyboard sketch but now it looked wrong. I didn't like the tree and the streetlamp looked too modern. The gargoyle at the doorway wasn't right either.
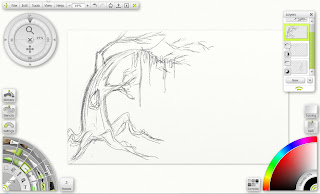
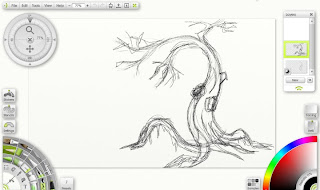
Time to load up Artrage and, with a line of action as a starting point, I used the pencil to roughly sketch out a couple of trees and gargoyles.
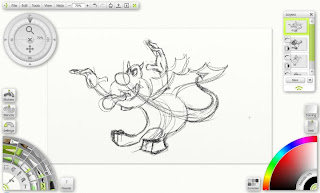
These were loaded into Anime Studio and traced and filled.
Eventually I ended up with four scene elements on separate layers ready for compositing. Incidentally, I didn't worry too much about the colours of the individual elements for creating a depth effect (the further away parts of a scene get the less saturated and more blue they appear) as I knew I could adjust this in the compositing software.

I could have rendered out stills and imported these into the compositing software for animating but I decided to animate the camera in Anime Studio and render out 4 separate animations. This enabled me to animate the tree branches blowing in the wind too. Once I was happy with the animation I started loading the elements into VisionLab.
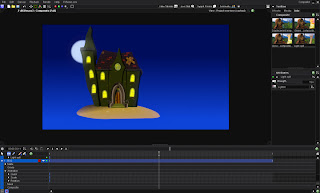
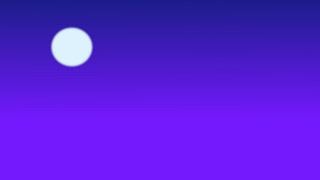
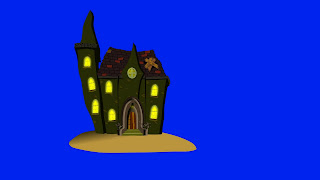
In the image above the first two elements have been loaded. I used a Light Spill filter on the house layer to add the appearance of light bleeding around it's edges from the moon behind.
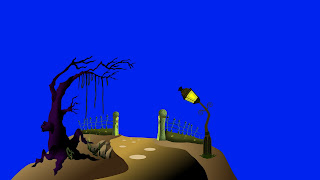
Next to be imported was the mid ground layer. Here is how the project appears when it's first imported.

In order for the other layers to show through I needed to make the blue of the background transparent.
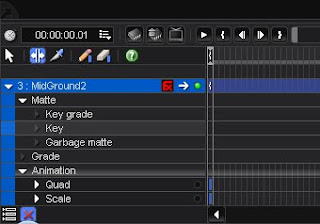
Under the Matte option I picked Key.
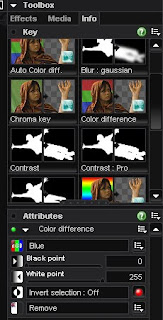
In the key filter options that opened I chose Colour Difference and selected Blue. After a little adjusting of the sliders the background was completely transparent. Now I needed to add some lighting effects.
In the Effects Panel I chose Optics and dragged a suitable light onto the lamp post. This had to be animated as the lamp post was moving closer to the camera. A keyframe at the start of the move and another at the end sufficed.
I also added a similar light to the lantern over the door and a Spotlight to the doorway itself to add to the effect. Next the foreground tree was imported.
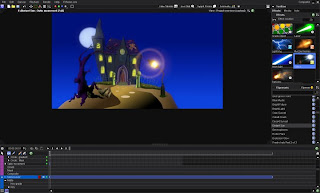
Under the Effects Tab I chose Particles and added three layers of spooky green fog. By the way, VisionLab is an excellent application and the company, FXHome, that created it are always enthusiastic and helpful. Most off the effects presets are created by users and free to download. The Green Fog, for instance, is a preset that was created by me several years ago for uses such as in this very shot.
After a bit of tweaking the above image shows a frame as rendered from VisionLab. The frames were exported as Targa files and loaded into my editing software.
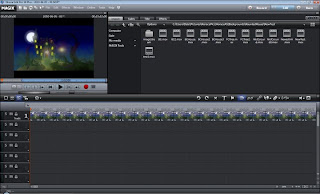
To finish I rendered out as a HD QuickTime Movie.
As always please feel free to comment or ask questions. See you soon.
This shot features a track towards a Haunted House. A few years ago I created a Haunted House in 3D so I used this as my starting point and traced it in Anime Studio.

I still have the door and door archway to trace in the above image. As I wanted to track towards the house I needed the various parts of the scene on separate layers so I could move them independently. I ended up with this.

It wasn't really satisfactory. It looked okay in my original storyboard sketch but now it looked wrong. I didn't like the tree and the streetlamp looked too modern. The gargoyle at the doorway wasn't right either.
Time to load up Artrage and, with a line of action as a starting point, I used the pencil to roughly sketch out a couple of trees and gargoyles.


These were loaded into Anime Studio and traced and filled.
Eventually I ended up with four scene elements on separate layers ready for compositing. Incidentally, I didn't worry too much about the colours of the individual elements for creating a depth effect (the further away parts of a scene get the less saturated and more blue they appear) as I knew I could adjust this in the compositing software.


I could have rendered out stills and imported these into the compositing software for animating but I decided to animate the camera in Anime Studio and render out 4 separate animations. This enabled me to animate the tree branches blowing in the wind too. Once I was happy with the animation I started loading the elements into VisionLab.

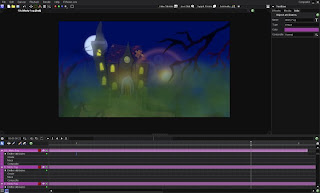
In the image above the first two elements have been loaded. I used a Light Spill filter on the house layer to add the appearance of light bleeding around it's edges from the moon behind.
Next to be imported was the mid ground layer. Here is how the project appears when it's first imported.

In order for the other layers to show through I needed to make the blue of the background transparent.

Under the Matte option I picked Key.

In the key filter options that opened I chose Colour Difference and selected Blue. After a little adjusting of the sliders the background was completely transparent. Now I needed to add some lighting effects.

In the Effects Panel I chose Optics and dragged a suitable light onto the lamp post. This had to be animated as the lamp post was moving closer to the camera. A keyframe at the start of the move and another at the end sufficed.

I also added a similar light to the lantern over the door and a Spotlight to the doorway itself to add to the effect. Next the foreground tree was imported.

Under the Effects Tab I chose Particles and added three layers of spooky green fog. By the way, VisionLab is an excellent application and the company, FXHome, that created it are always enthusiastic and helpful. Most off the effects presets are created by users and free to download. The Green Fog, for instance, is a preset that was created by me several years ago for uses such as in this very shot.

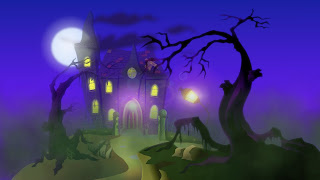
After a bit of tweaking the above image shows a frame as rendered from VisionLab. The frames were exported as Targa files and loaded into my editing software.

To finish I rendered out as a HD QuickTime Movie.
As always please feel free to comment or ask questions. See you soon.
All text and images (c) 2010 Dale Hemenway